Classroom Organization

Setting Up Your Classroom

Creating a classroom layout can be very exciting but also very frustrating. Very likely it will take several tries to find an arrangement that works. I often make adjustments as the year goes on. I like to try new arrangements and usually try a new arrangement each year. Years ago I would use graph paper and meticulously cut out furniture shapes to scale and try various paper arrangements. Now, there are several classroom design websites that make this task much easier.

First, you will need to get the dimensions of your classroom (length, width) as well as general sizes of your furniture. Pay a visit to your classroom armed with a measuring tape and a pad of paper. Draw a rough sketch of the classroom walls and record the measurements. Also pay attention to where there are built-in features like cabinets, counters, sinks, doors, and windows. Get the measurements of those as well. Then visit one of these websites and have fun trying out new arrangements:

Lakeshore Learning (look for the Classroom Designer feature under Teacher Resources)

Childcraft

Once you have a classroom arrangement, you can use some of the organization ideas and tips/tricks listed below to make your classroom an efficient organized place to work and play!

Classroom Organization

Classroom Labels Set 1 (.doc)     Classroom Labels Set 1 (pdf)     Classroom Labels Set 2 (.doc)

Print and use these labels to organize your classroom. I print two copies--one set is taped to the shelves and the other set is used to label the buckets that hold the materials. Labeling the shelves as well as the buckets makes clean up so much easier...the children know exactly where the materials belong.

Book Basket Labels

I use these to label the book baskets in our classroom library. I simply printed them on regular paper and attached them to the bins with packing tape. The letter in the colored circle on the left side corresponds to the colored sticker I put on each book that belongs in that basket. I used AVERY Print or Write Color Coding Label (#05472) to label the books.

Classroom Schedule with Pictures

These are sized to fit the pocket chart from Target but you could easily make them smaller if you want to post them on your board. In the past I have printed them on cardstock, laminated, and attached them to the board with magnetic tape.

Center Rules

Use these posters for teaching Center Time rules and procedures. Then post them near your center sign up chart(s).

Large Center Signs (Literacy and Developmental)

These signs print on a full size sheet of regular copy paper. I like to glue them to sheets of construction paper so that they have colored borders (you can even make these colored borders match your sign up charts--see Monthly Centers page). Post these signs around your room to identify the various center areas.

Directions for Creating Your Own Signs and Labels

This document provides very easy directions for creating your own large center signs, classroom labels, center sign up pictures, etc using Microsoft Word. You can also use the same techniques to make schedule signs, worksheets, card games, etc.

Tips and Tricks

Name Tags That LAST

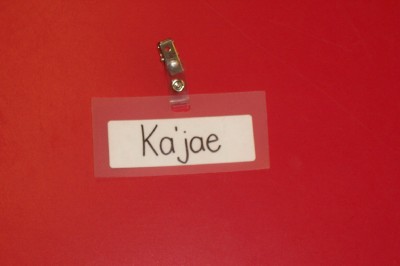
For name tags that last, purchase one or two poly binders (the floppy kind). Cut the front and back cover off of the binder. Cut these sheets into name tags (I just use rectangles but you could get fancy). I used name badge clips (from Staples) but if you are short on funds, you could just use yarn or ribbon to attach the name tag to the child. For the badge clips, I hole punched a large oval (used a regular hole punch--several holes together) and slipped the clip through. For yarn or ribbon, just punch two holes and thread. You can write the children's names directly on the name tag or put a label on (but some children like to peel the label off). Since my tags are clear, I wrote directly on the tag and put a label on the BACK so the name will show up.
Desk Tags That LAST

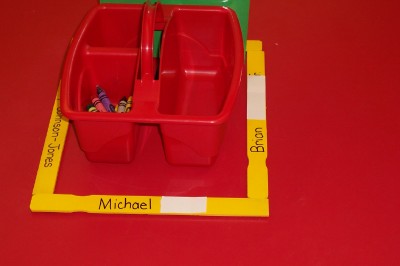
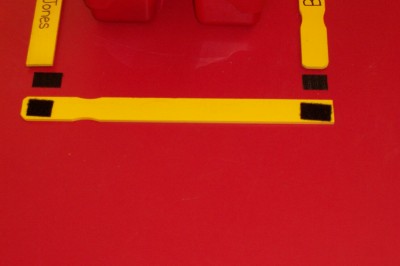
A few years ago, Mailbox magazine suggested using paint stir sticks for name tags on tables or desks. They recommended painting one half red (for first name) and the other yellow (for last name). That was too time consuming but I did like how the sticks lasted all year. Now I simply spray paint the sticks yellow (use a glossy finish--Rust-oleum Gloss Protective Enamel works great!). To make a good idea even better, I use Velcro to attach the sticks to my tables. This makes it very easy to change assigned seats. I put the rough side of the Velcro on the table and the soft side on the sticks. I use one piece at each end of the stick. Make sure you place it in the same place on each stick so that they will be interchangeable. To make it very simple to apply the Velcro to the tables, I put the soft side on the sticks first and then stick the rough side to it. I lay out all of the sticks on the table and then peel the backing from the rough side. I have only had one stick destroyed in 5 years and that really required a lot of effort from a tantruming child!
Lunch Money Containers

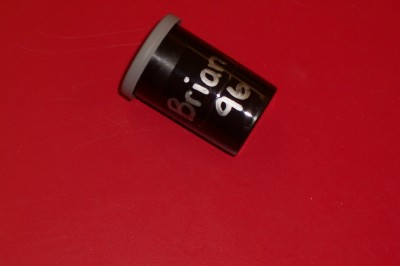
My students use pin numbers when they purchase their lunches in the cafeteria. Of course the numbers are usually 4 digits and not very easy to remember. To help the children remember their numbers and to keep track of lunch money, we use empty film canisters. I use a silver Sharpie to write the child's name and pin number on the container and I cover the writing with clear tape (to keep it from rubbing off). The containers are the perfect size for holding coins. Bills can fit if you fold them. One additional benefit is that if the child gets change, the cafeteria staff just puts it back in the container. I provide the cafeteria with a plastic basket for the containers and they collect them from the children as they pay. No more coins accidentally thrown away with the tray.


Search for other behavior management ideas:

Google


Return to Kellyskindergarten.com